Cutting Schedule by 50%: The Speed Advantage Explained
Jump to section
Construction schedules keep getting tighter, and labor hours are shrinking on every job. Fast-install systems are a must, but nobody wants to add risk. Insulated metal panels (IMPs) shake up the pace by combining structure, insulation, air barrier, vapor barrier, and finish into one factory-made unit. Crews can install them in a single pass.
One-step IMP installation can slash your construction schedule by up to 50%. Instead of juggling several trade sequences, you get a single coordinated install. This wipes out waiting time, rework, and weather delays. Panels show up pre-sized, pre-finished, and ready to set. Crews focus on placing panels, not managing layers and handoffs. Fewer mobilizations, shorter dry-in time, and earlier access for interior trades—these are the real-world results.
Speed actually starts before the first panel even lifts. When panel sizes, spans, and details are locked in early, manufacturers produce units that fit the structure and install with predictable tolerances. Planning like this reduces field cuts, avoids clashes at penetrations, and lowers callback risk. You keep the schedule gains you planned from the start.
Can You Really Cut Your Schedule in Half?
Cutting your schedule by about 50% becomes possible when you remove trade stacking, weather exposure, and rework. A single, properly installed building envelope system makes that happen.
- Method: Swap out multi-step wall assemblies for one-step IMP installation.
- Condition: Plan panel layout, tolerances, and sequencing before work begins.
- Limit: Speed gains vanish if installation errors trigger callbacks.
The Construction Bottleneck: How Traditional Multi-Layered Walls Delay Schedules And Expose Projects To Weather Risks
Traditional wall systems slow projects down because many trades need to work in sequence, not in parallel.
- Cause: A typical wall uses framing, exterior sheathing, air barrier, insulation, vapor barrier, and cladding—all installed on different days.
- Effect: Each layer waits for the one before it to finish and get inspected, which leads to idle time.
- Risk: Open walls leave your building envelope exposed to rain and wind. Wet insulation and delayed inspections are pretty common in practice.
For cold storage projects, the risk only increases.
- Detail: Moisture trapped in wall cavities lowers thermal resistance.
- Result: Drying time, material replacement, and schedule slip can follow.
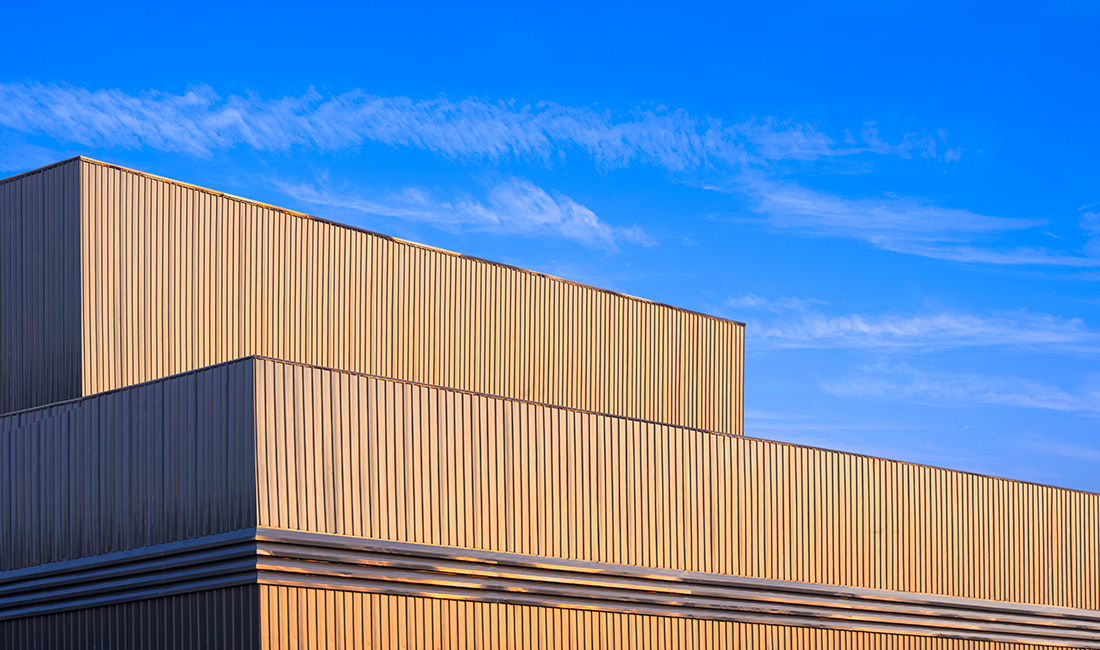
The “One-Step” Solution: Introducing IMPs As A Single Component (Barrier + Insulation + Waterproofing + Face)
IMPs save time because one panel handles four wall functions in a single lift.
- Component: An insulated metal panel combines metal skins, rigid insulation, an air and vapor barrier, and a finished face.
- Design: Factory-controlled lamination sets insulation thickness and keeps panels flat.
- Result: Crews install structure and envelope at once.
This changes the entire site flow.
- Translation: Fewer trades work on the wall, so there are fewer handoffs and less waiting.
- Performance: Continuous insulation boosts thermal resistance across the whole envelope.
- Use case: In cold storage construction, hitting target temperatures sooner means commissioning can start earlier.

The Thesis: Speed Is Not Automatic; It Is The Result Of Precision. A “Fast” Installation That Requires Callbacks Is Actually A Slow One
Speed only happens when IMP installation meets alignment, seal, and fastening requirements right from the start.
- Attribute: IMP systems depend on tight panel joints and correct clip spacing.
- Why it matters: Poor alignment breaks air and vapor seals.
- Result: Losing thermal control means stopping work to fix leaks.
- Process: Pre-planned panel sequencing and verified tolerances prevent fit-up headaches.
- Translation: Fewer callbacks let crews stay productive instead of circling back to finished areas.
- Reality: Sometimes, a careful install wraps up faster than a rushed job that needs rework.
How Does One System Replace Five Trades?
One installed system can replace several separate scopes. Insulated metal panels combine structure-facing enclosure functions into a single prefab assembly, installed in one coordinated pass.
The 4-In-1 System: Explaining How IMPs Integrate Air, Vapor, Thermal, And Moisture Barriers Into One Element
IMPs take the place of multiple enclosure layers because one factory-built panel does four barrier jobs at once.
- Air Barrier: Continuous steel skins with sealed joints cut down air leakage. Fewer field-applied membranes and less rework at transitions.
- Vapor Control: The metal facer and sealed seams handle vapor movement. No need for separate vapor films or extra trade coordination.
- Thermal Performance: The foam core delivers a known R-value across the full panel area. No gaps from missed insulation.
- Moisture Management: Interlocking panel joints shed bulk water when installed per manufacturer details. This replaces fluid- or sheet-applied weather barriers.
IMPs show up as prefab components. The factory controls thickness, density, and bond quality. One crew can install what would usually take several specialized trades.
The Comparison: Visualizing The Difference Between “1 Pass” (IMP) Vs. “4-5 Passes” (Tilt-Up Or Stud Framing)
The schedule difference comes down to reducing repeated work over the same wall area.
- IMP Approach (1 Pass): One crew sets panels, seals joints, and finishes the exterior face. Fewer mobilizations and handoffs.
- Traditional Framing (4–5 Passes): Separate crews frame, sheath, apply air barrier, add insulation, and install cladding. Each pass depends on the last.
- Coordination Load: Multiple passes mean more trade stacking and site congestion. Research suggests reduced working space can cut productivity by up to 50%.
- Error Risk: More layers create more interfaces. Every interface adds inspection time and risk for corrections.
By consolidating steps, IMPs remove idle time between trades and shorten the critical path.
The “Dry-In” Advantage: How Getting The Building Watertight Earlier Accelerates Interior Trades
Early dry-in changes when interior work can start.
- Watertight Envelope: IMPs create a sealed exterior as panels lock and seal. Interior trades can mobilize sooner.
- Interior Schedule Pull-Forward: Electrical, mechanical, and framing crews work without weather delays. This cuts down stop-start cycles.
- Material Protection: Dry conditions protect finishes and equipment. Less damage risk and cleanup time.
- Predictable Sequencing: Earlier enclosure completion stabilizes the schedule. Interior work moves forward without waiting on exterior barrier inspections.
IMPs shorten the enclosure phase, so usable interior space comes faster and downstream trades keep moving.
How Do You Win The Race Before Installation Even Starts?
Speed starts before install day by fixing alignment, staging materials with intent, and using mechanical aids that cut handling time. These steps eliminate delays that crews can’t recover from once panels are in the air.
Structural Alignment (Plumb And Square): Emphasizing That You Cannot Install A Straight Panel On A Crooked Wall (The #1 Industry Keypoint)
Definition: Winning before installation means verifying walls are plumb, level, and square, so panels seat right the first time.
- Tolerance: Check walls with a laser level and 6-foot straightedge. Hold plumb and level within ±1/8 inch over 10 feet. This avoids forced shimming that slows every panel.
- Cause: Panels leave the factory square within tight tolerances. When substrates vary, the mismatch creates gaps. The wall controls the panel plane, so alignment errors add up across runs.
- Method: Shim and correct framing before delivery. Mark high and low points. Installers set panels once, not twice.
- Risk Control: Crooked walls cause edge stress and fastener pull. Fixing alignment upfront means less rework and fewer damaged corners.
Staging And Handling: Organizing The Site To Minimize Movement
Definition: Winning means staging panels in install order and within arm’s reach of the set location.
- Layout: Place panels on A-frames within 15–20 feet of the install line. Shorter travel cuts carry time per panel.
- Sequence: Stage by elevation and room, not by delivery order. Installers follow a set path, so this avoids reshuffling stacks.
- Protection: Use foam separators and edge guards. Fewer chips, fewer repairs, and fewer delays.
- Access: Keep aisles at least 36 inches wide. Clear paths prevent pauses from lifts, cords, or debris.
- Accountability: Label panels with location IDs. This removes guesswork and keeps crews moving.
Mechanical Advantage: Using Vacuum Lifters To Speed Up Lifting And Reduce Crew Fatigue/Damage
Definition: Winning means using vacuum lifters sized to panel weight, so one controlled lift replaces a bunch of manual moves.
- Capacity: Select lifters rated at least 2× the panel weight, like a 600–1,000 lb unit for large IMPs. This margin keeps grip secure during micro-adjustments.
- Control: Dual-circuit systems with pressure gauges show seal status. This reduces drops and edge damage.
- Efficiency: A lifter lets one operator place a panel while others fasten. Idle time per set drops.
- Ergonomics: Less manual handling means less fatigue. That keeps pace steady all day without quality loss.
- Consistency: Mechanical lifts place panels square on the first try, keeping alignment true across the run.
What Is the Secret to “Zero-Callback” Execution?
Definition: Callbacks get avoided when the air and vapor barrier is locked, full contact happens at every interlocking joint, and panels are cut cleanly so corrosion never starts.
- Sealants: Continuous butyl sealant stops air and moisture leaks before they form.
- Joinery: Foam-to-foam contact removes thermal bridges at the joint.
- Cutting: Proper cutting tools prevent rust stains that drive rework.
The Invisible Critical Path (Sealants): Applying Continuous Butyl Sealant Correctly In The Joinery Before Lifting To Ensure The Vapor Barrier Holds
Definition: Continuous butyl sealant in the joint creates an unbroken vapor barrier that survives lifting and setting.
- Material: Manufacturer-approved butyl sealant with a known tack and compression range keeps the seal pliable when panels move during lifting.
- Method: Apply a single, unbroken bead or tape along the full length of the joinery before the panel leaves the ground. No gaps that turn into air paths.
- Timing: Seal before lifting, not after setting. The interlocking joint closes under load, so the seal compresses evenly.
- Check: Inspect squeeze-out along the seam after set. Visible squeeze-out confirms compression and continuity.
The Perfect “Marriage”: Ensuring Strict Foam-To-Foam Contact To Prevent Thermal Bridging And Ensure A Tight Lock
Definition: Full foam-to-foam contact at the interlocking joint blocks heat flow and locks panels in place.
- Alignment: Set panels square so the male and female profiles engage fully. This avoids metal-to-metal contact that would create thermal bridges.
- Pressure: Push the joint to the manufacturer’s lock depth. Stop when the joint closes, not just when it looks closed.
- Tolerance: Clear away debris and old sealant before setting panels. Even small bits can block full contact.
- Result: Continuous foam contact keeps the stated R-value across the seam. This helps avoid cold spots and reduces callbacks.

Proper Cutting Protocols: Using The Right Tools (Saw Blades, Not Torches/Abrasives) To Prevent Rust Stains That Cause Rework
Definition: Clean cuts with the right tool protect coatings and stop corrosion before it starts.
- Tool: Use a cold-cut saw with carbide-tipped blades made for coated steel. This avoids heat-damaged edges.
- Avoid: Skip torches and abrasive wheels. Heat burns the coating and embeds steel fines that rust later.
- Handling: Remove chips from the cut edge and panel face right away. Leftover fines stain the finish after rain.
- Finish: Seal exposed edges as the panel guide says. That blocks moisture and keeps rust marks from showing up.
What Are the “Speed Bumps” That Will Kill Your Schedule?
Schedule delays usually don’t come from panel install speed alone. Time gets lost when moisture control fails, panels arrive with damaged joints, or crews rush details that later fail inspection or leak testing.
Broken Vapor Continuity: How Gaps In Sealant Lead To Condensation And Failure
- Cause: Gaps in sealant break the vapor barrier at panel joints. When warm, moist air moves through these gaps, it hits colder surfaces inside the wall.
- Effect: Condensation forms inside the panel assembly. Moisture then gets trapped against metal skins and insulation, leading to corrosion, mold, and loss of thermal performance.
- Why it matters: Broken vapor continuity also increases thermal bridging at joints. Heat escapes through unsealed metal paths, which lowers the wall’s effective R-value and leads to rework after infrared scans.
- Schedule impact: Work stops to dry assemblies, reseal joints, and retest. Each repair adds labor days and delays other trades waiting on a dry building envelope.
Handling Damage: How Edge Damage During Manual Lifting Compromises The Weather Seal
- Cause: Manual lifting or bad rigging bends panel edges or crushes tongues and grooves. These edges control alignment and compression of factory-applied gaskets.
- Effect: Deformed edges stop full gasket contact. The weather seal fails, even if the panel face looks fine.
- Why it matters: Damaged edges create micro-gaps that bypass the vapor barrier. Air and water sneak through, raising condensation risk and breaking down sealant faster.
- Schedule impact: Crews have to pause and straighten edges, add field sealant, or even reject panels. These fixes slow things down and mess with crane sequencing, causing more delays.
Neglecting Detail Work: Rushing Through Flashings And Trim, Leading To Water Intrusion
- Cause: Crews rush flashings, trims, and terminations to hit daily panel counts. Missed laps, reversed overlaps, or loose fasteners break the drainage plane.
- Effect: Water finds its way in at transitions, not through the panels themselves. Leaks show up at corners, sills, and roof interfaces where movement and pressure shift.
- Why it matters: Poor detailing creates thermal bridges and vapor leaks in specific spots. These areas fail first during blower door or hose tests.
- Schedule impact: Finished areas get reopened for corrections. That rework stops progress and pushes back inspections, drying-in, and the start for other trades.
Frequently Asked Questions
What are the recommended steps for installing insulated metal panels (IMPs)?
Start by checking steel alignment and tolerances—IMPs mount directly to the structure. Plumb framing within tight limits, often ±1/8 inch, ensures proper joint compression.
Set panels in sequence, secure them with concealed fasteners, and seal the joints as specified. Since the insulation, air barrier, and exterior skin arrive as one unit, enclosure wraps up in a single pass.
How can you achieve faster installation times with one-step IMP systems?
One-step IMP systems cut installation time because each panel combines insulation, vapor control, and exterior finish in a factory-built unit. This removes extra steps like batt insulation, girts, and exterior cladding.
Crews handle fewer materials and make fewer lifts. Labor hours for enclosure often drop by up to 50% compared to multi-layer wall assemblies, depending on building size and crew experience.
What are the key benefits of using IMPs for both walls and roofs?
IMPs provide continuous insulation because the foam core runs edge to edge with no thermal breaks at studs. That means lower heat loss and more stable indoor temperatures.
Wall and roof panels use interlocking tongue-and-groove joints. These joints limit air and water infiltration, so long-term maintenance tied to leaks and condensation drops off.
Can the length of IMP panels be customized to fit specific project dimensions?
Absolutely—manufacturers can make IMPs in custom lengths, sometimes up to 50 feet. The actual maximum depends on transport limits and what the crane can handle.
Longer panels mean fewer vertical or horizontal joints to deal with. Fewer joints usually translate to a quicker install and less hassle with seal maintenance down the road.
Want to Know More About Our Products?
View All Products Now