The Hidden Cost Of Cold: How A Better Thermal Envelope Cuts Energy Bills And Boosts Home Efficiency
Jump to section
Energy is your largest operating expense, yet many facilities bleed thousands annually through invisible leaks in their thermal envelope. While powerful compressors are essential, they cannot compensate for poor insulation and weak seals. Every gap forces your equipment to work harder, driving up utility bills and accelerating wear. Improving your building’s shell isn’t just maintenance—it’s a strategic defense that can cut thermal loads by up to 50%.
The Physics Of Loss: How Poor Insulation Burns Money
Heat escapes when insulation weakens, air moves through gaps, and structural materials bypass thermal barriers. Every path of loss forces heating and cooling systems to work longer, increasing energy use and eroding comfort.
R-Value Degradation
Definition: R-value degradation is the gradual decline in insulation’s thermal resistance over time, reducing its ability to block heat transfer.
- Cause: Materials like fiberglass can settle within wall cavities, creating air pockets and lowering effective R-values. The trapped air that once resisted heat flow becomes unevenly distributed.
- Moisture Effect: When insulation absorbs moisture, water fills air spaces that should resist heat flow. Even 1% moisture by weight in fiberglass can cut its resistance by up to 10%.
- Aging Materials: Spray foams lose performance if exposed to UV or humidity over years because gases that give them high R-values dissipate.
- Practical Impact: Lower R-values mean steady heat loss in winter and heat gain in summer. For the homeowner, this translates to higher energy bills and equipment running time even when thermostat settings stay the same.
Infiltration & Vapor Drive
Definition: Infiltration and vapor drive are air and moisture movements through the building shell that undermine insulation and heat retention.
- Air Leakage: Warm interior air rises and exits through cracks while cold outside air enters through gaps. This uncontrolled movement—called the “stack effect”—carries heat and humidity with it.
- Vapor Movement: Water vapor migrates from warm to cold surfaces. When it condenses inside insulation, it reduces thermal resistance and can freeze into ice during cold months.
- Moisture Consequences: Saturated insulation conducts heat easily, cancels the thermal barrier, and contributes to ice dams on roofs.
- Energy Loss Meaning: Reduced insulation performance means the heating system must replace lost heat continuously. In practice, this adds both fuel cost and strain on HVAC equipment.
Thermal Bridging
Definition: Thermal bridging occurs when conductive building elements bypass insulation, allowing heat to move directly through structural paths.
- Mechanism: Steel studs, concrete beams, or metal fasteners conduct heat far faster than insulating materials around them. A single uninsulated steel beam can transmit twenty times more heat than adjacent insulated framing.
- Detection: These paths often appear as cold streaks on infrared imaging, showing where warmth leaks outward in winter.
- Design Flaw: Bridges defeat even thick insulation layers because they short-circuit the thermal barrier.
- Real Impact: Heat bridges create cold interior surfaces that lower comfort and raise condensation risk. For occupants, that means colder walls, potential mold growth, and measurable rises in energy consumption.
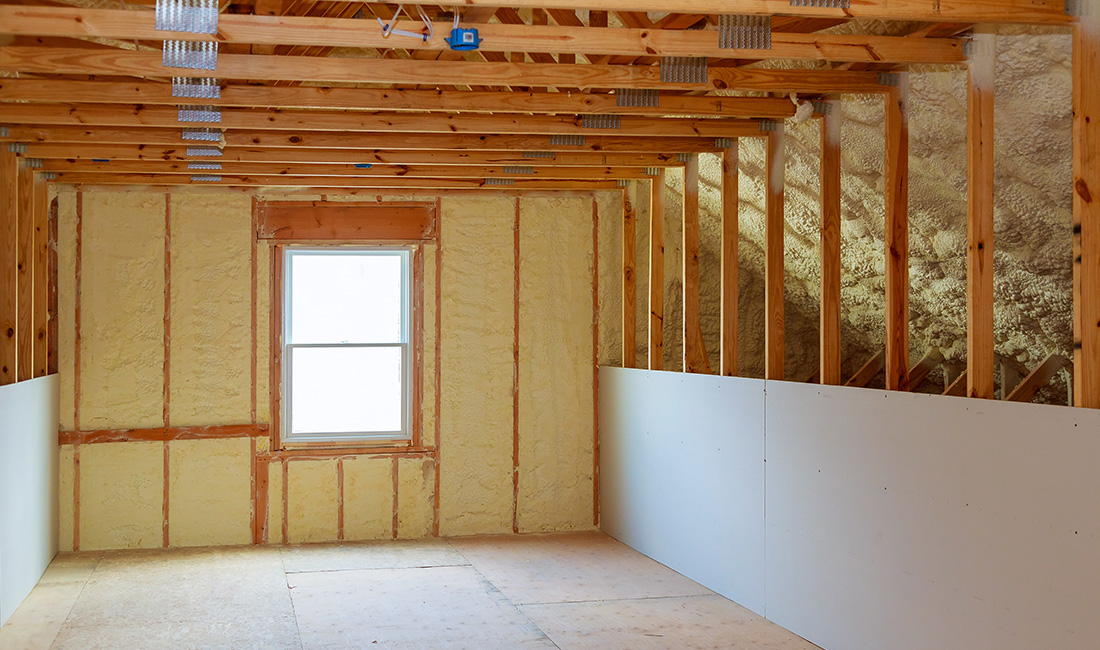
Strategy 1: Fortifying The Shell (Walls & Roofs)
A building’s shell—its walls and roof—acts as the primary barrier between indoor comfort and outdoor conditions. Strengthening this shell reduces heating and cooling demands by limiting unwanted heat flow through the envelope.
The key lies in using proper insulation layers and removing paths for thermal bridging. Material choice makes a measurable difference.
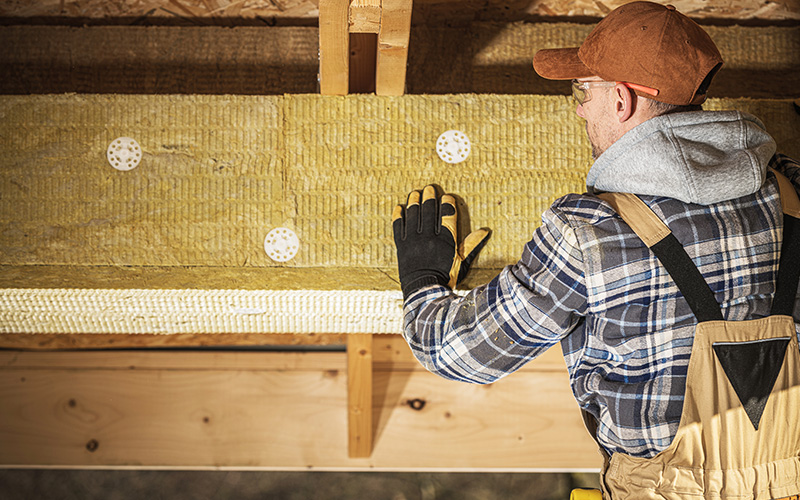
Fiberglass batt insulation offers an average R-value of 3.2–3.8 per inch. Cellulose insulation provides about R-3.6 per inch due to its dense fill that seals small gaps.
Spray foam insulation stands out with R-6 to R-7 per inch, forming an air-tight layer that prevents drafts and moisture migration. In practice, this means fewer cold spots in winter and slower heat gain in summer.
A continuous insulation system—where the insulating layer runs without interruption across studs or joists—limits heat conduction through framing materials. This design matters because wood and metal transmit heat far more readily than insulation.
For the occupant, it translates to a steadier indoor temperature and lower HVAC loads. Roofs deserve special attention, too.
Because warm air rises, poorly insulated attics lose heat faster than walls. Adding attic insulation or combining rigid foam panels with reflective “cool roof” coatings helps maintain interior comfort.
When you apply these upgrades thoughtfully, the shell gets stronger and energy costs drop. Better thermal resistance and less air leakage really do add up over time.
Strategy 2: Managing The Weakest Links (Doors & Docks)
Doors and loading docks often act as thermal weak spots that let heat escape and cold air in. Even small air leaks around door frames or dock shelters increase energy use and cause uneven temperatures.
Managing these weak links means using smart design and doing routine sealing maintenance. A high-speed door reduces the time a building stays open to outdoor conditions.
Because it cycles much faster than a standard sectional door, it limits air infiltration by cutting the exposure time when forklifts move in and out. In practice, this can lower heating or cooling losses during busy periods.
Dock seals and shelters close the gap between trucks and the building. When fitted right, the seal compresses to block drafts and moisture.
For the user, this means less temperature fluctuation in loading areas and a smaller HVAC workload. Here are some common trouble points and fixes:
Simple steps like air sealing gaps, replacing worn weatherstripping, or adding air curtains above busy doors create an invisible barrier that slows thermal mixing. Over time, these targeted actions can reduce energy bills while keeping working zones more comfortable.
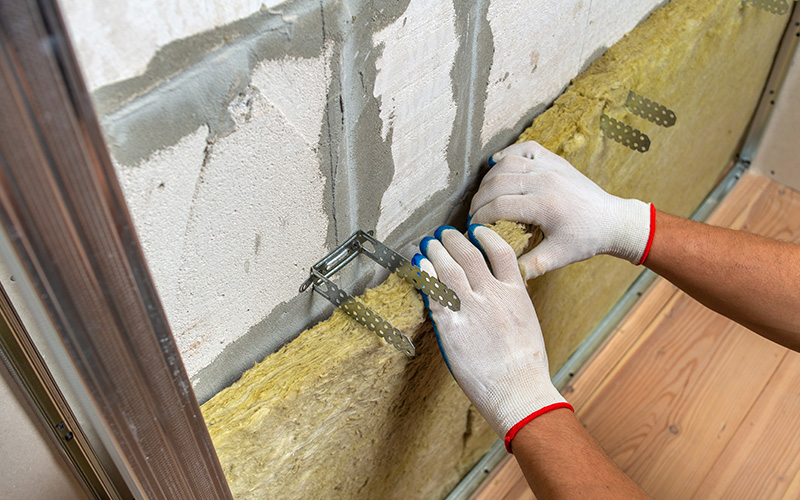
Strategy 3: The Overlooked Foundation (Underfloor Insulation)
Many homeowners focus on walls and attics when improving energy efficiency but overlook the foundation. Heat naturally moves toward cooler areas, and without proper underfloor insulation, it escapes through the floor into the ground.
The Department of Energy reports that an insulated basement or crawl space can reduce heating costs by up to 30%. That’s a lot of energy lost underfoot.
Concrete slabs and crawl spaces act as large heat sinks. Because concrete has a thermal conductivity of about 1.7 W/m·K, it transfers heat far faster than wood or insulation materials.
Installing rigid foam boards—such as expanded polystyrene (EPS) or extruded polystyrene (XPS)—adds a thermal break that slows heat flow between the slab and surrounding soil. In real life, this makes floors feel warmer and keeps indoor temperatures steadier.
Underfloor insulation also protects the structure. In cold regions, poorly insulated slabs can experience frost heave, where freezing soil expands and cracks the concrete.
By limiting heat loss through the slab, insulation keeps the ground temperature more consistent and reduces structural stress. For the homeowner, this means lower repair costs and a longer building life.
Whether you’re building new or retrofitting, home insulation installation beneath floors is one of the most practical—and overlooked—steps for cutting energy losses and boosting comfort.
Actionable Audit Checklist: Is Your Envelope Failing?
A building’s thermal envelope includes all barriers—walls, doors, windows, roof, and insulation—that separate indoor and outdoor air. Failures in this envelope let heat escape or infiltrate, driving up heating and cooling costs.
Audit Focus Areas
- Visual Inspection: Check for frost, moisture, or dark streaks on walls and ceilings. These signs usually mean the insulation has gaps or compression.
- Door and Window Tests: Close each door or window and slide a sheet of paper between seals. If it moves freely, the gasket isn’t sealing properly, so conditioned air is escaping.
- Thermal Imaging: A basic infrared thermometer or camera can reveal hidden thermal bridges. These bridges show up as cold spots where framing or materials conduct heat faster than surrounding insulation.
- Insulation Review: Measure insulation depth with a ruler. Compare observed R‑values with recommended standards for your climate zone.
- Attic and Duct Gaps: Look at areas where pipes, wires, or ducts pass through ceilings. If foam sealing is missing, air is exchanging between conditioned and unconditioned spaces, making heating and cooling systems run longer.
By inspecting these elements methodically, homeowners can find where their building envelope is underperforming. With that knowledge, it’s possible to plan targeted improvements that lower energy use.
Conclusion: Passive Defense Is The Best Offense
Upgrading your equipment helps, but fixing your building’s shell solves the real problem. By sealing leaks and maximizing insulation, you stop energy waste before it starts—cutting demand by up to 20%. A tighter envelope means lower bills, less wear on machinery, and a healthier indoor environment. In the battle for energy efficiency, a strong passive defense is your best offense.
Frequently Asked Questions
How does thermal bridging affect a building’s energy efficiency?
Thermal bridging happens when things like metal fasteners or wood studs carry heat straight through an insulated wall. These spots let heat leak out faster, dropping the wall’s real R-value.
That’s why you sometimes feel cold spots near walls or ceilings—heat’s just slipping away. Using insulated sheathing or smarter framing cuts down on these bridges and helps meet ENERGY STAR efficiency goals.
What role does air sealing play in reducing heating and cooling costs?
Gaps and cracks in walls, attics, or around windows let your conditioned air escape and outside air creep in. Sealing up those leaks with foam, gaskets, or weatherstripping keeps things steady indoors and stops wasted energy.
Good air sealing takes the pressure off your HVAC system because indoor temps don’t swing as much. In some climates, this can cut heating and cooling costs by up to 30 percent—pretty significant, right?
What insulation materials provide the best resistance to heat loss?
Materials with higher R-value per inch—like spray polyurethane foam, rigid foam panels, or closed-cell fiberglass—block heat flow better. Spray foam’s great because it insulates and seals air leaks in one go, stopping both conduction and convection losses.
Rigid foam panels work well on exterior walls to limit heat transfer through studs. If you combine these materials, you get solid insulation without making your walls too thick or bulky.
How often should a home’s insulation be evaluated for effectiveness?
It’s a good idea to check your insulation every five to ten years. If you start noticing rooms that feel oddly warm or cold, or if your energy bills creep up, that’s a sign something’s off.
Moisture, settling, or even a few pesky rodents can mess with how well your insulation works. These issues don’t always show up right away, so regular checks really matter.
If you’re unsure, an energy audit or a blower door test can point out trouble spots. Catching problems early helps your heating system last longer and keeps your costs down.
Want to Know More About Our Products?
View All Products Now